Full Compass Systems of Madison, WI was kind enough to allow me to take the Yamaha TF1, a compact digital mixer, for a test drive. The gig? Front of House for Chosen Few Fighting Championships. This event used a total of 4 inputs; Two handheld wireless mics and a stereo input for music.
Now, I would be considered a “studio guy” for lack of a better term. When I do off-site events, I’m mainly there to record along with some PA work thrown in occasionally. The Allen and Heath MixWizard 16:2 is one of the mixers I use regularly as well as a Soundcraft LX7ii 32Ch so it would be fair to say that I am more comfortable with analog mixers. That being said, I do work quite often with the Presonus StudioLive AI 16.4.2 mixer. This review is for experienced analog mix engineers and those considering taking the plunge into digital gear.

Home view of the Yamaha TF1 mixer
The Specs
The TF1 has 17 motorized faders; 16 channel faders and one master fader. There are 40 input channels (32 mono + 2 stereo + 2 return), 20 aux buses (8 mono + 6 stereo), and 8 DCA groups. With 16 Analog XLR/TRS combo mic/line inputs, 2 RCA pin stereo line inputs, 16 analog XLR outputs, this board also includes 34 digital record/playback channels via USB 2.0 port or 2 channel recording via USB to hard drive, 1 expansion slot for NY64-D audio interface card, and comes with Steinberg's Cubase AI.

The Setup
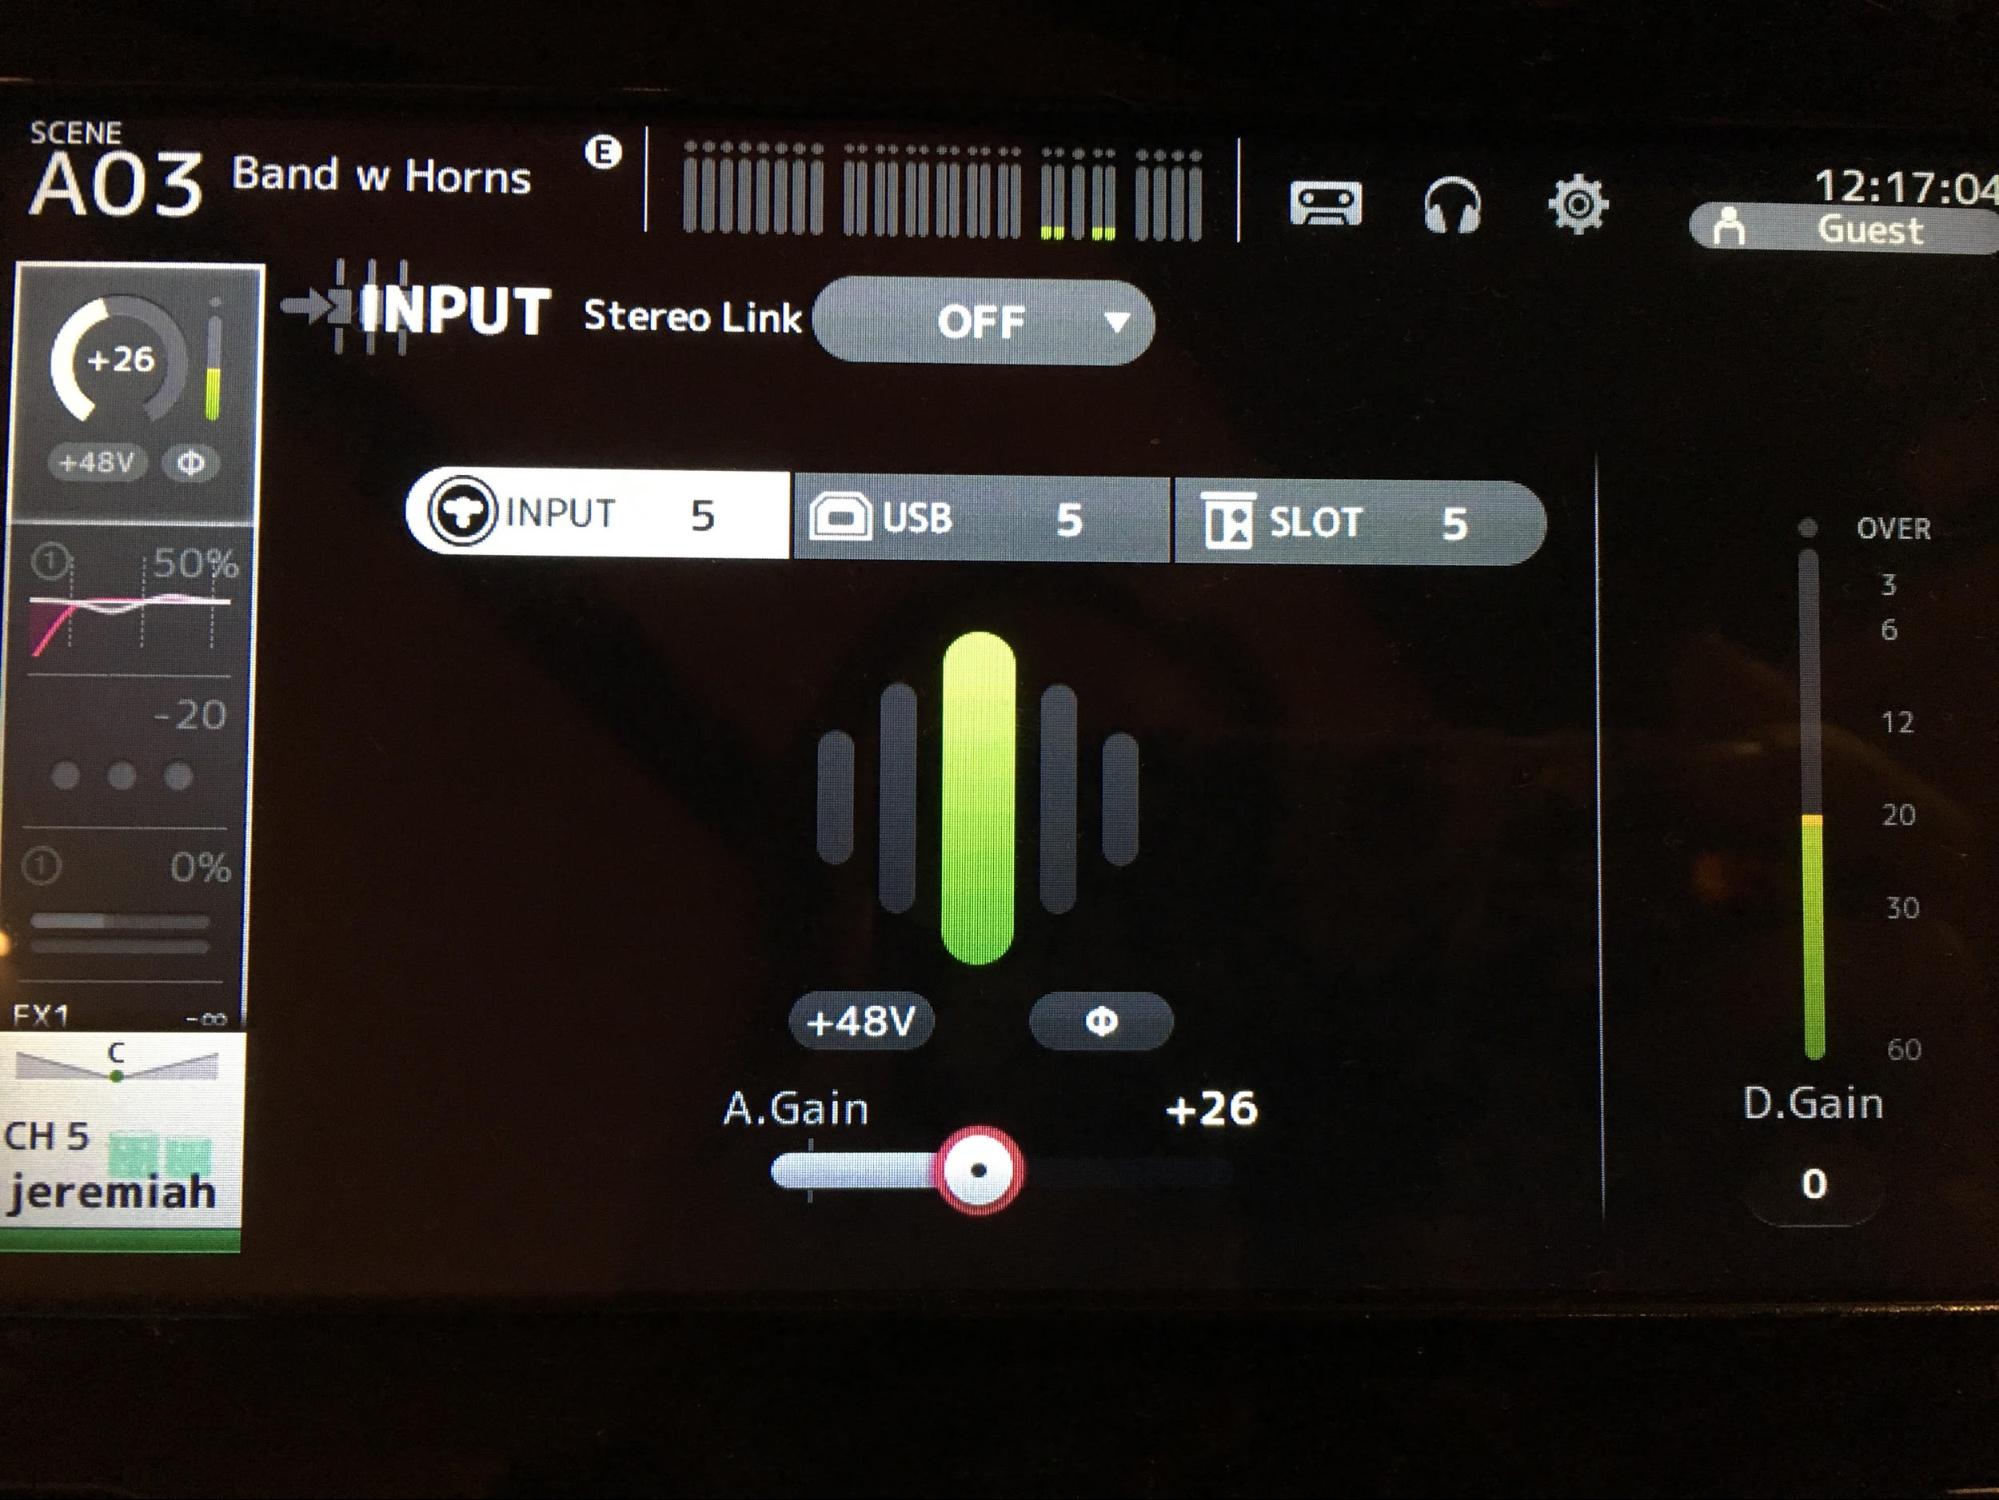
One of the two wireless mics was designated for the announcer, the other mic was predominately used for the DJ who also made announcements before the event started. While setting gain, the first thing I noticed was Yamaha’s GainFinder feature. It’s Yamaha’s way to help the engineer “make fast, accurate setup of this important basic parameter easier than ever,” according to their website. The engineer sets the channel gain so that the green indicator in the center remains lit for the longest possible time. Of course, there are still level meters which perform traditionally, however, if you’re a novice engineer, using GainFinder is a quick and easy way to set a level accurately.
The event was filmed for later broadcast so we needed to send a pre-fader mix to the TV station who recorded the audio. Sends are really intuitive to configure. You can view and set up sends on the touch screen, or tap any of the aux buttons located on the far right of the mixer to use the faders to send to each aux. On my Presonus StudioLive 16:4:2, you have to scroll through menus to be able to toggle the send between pre and post fader. However, on the TF1, you can switch between pre and post fader right below the send you’re configuring. It was definitely nice to have that setting right at my fingertips.

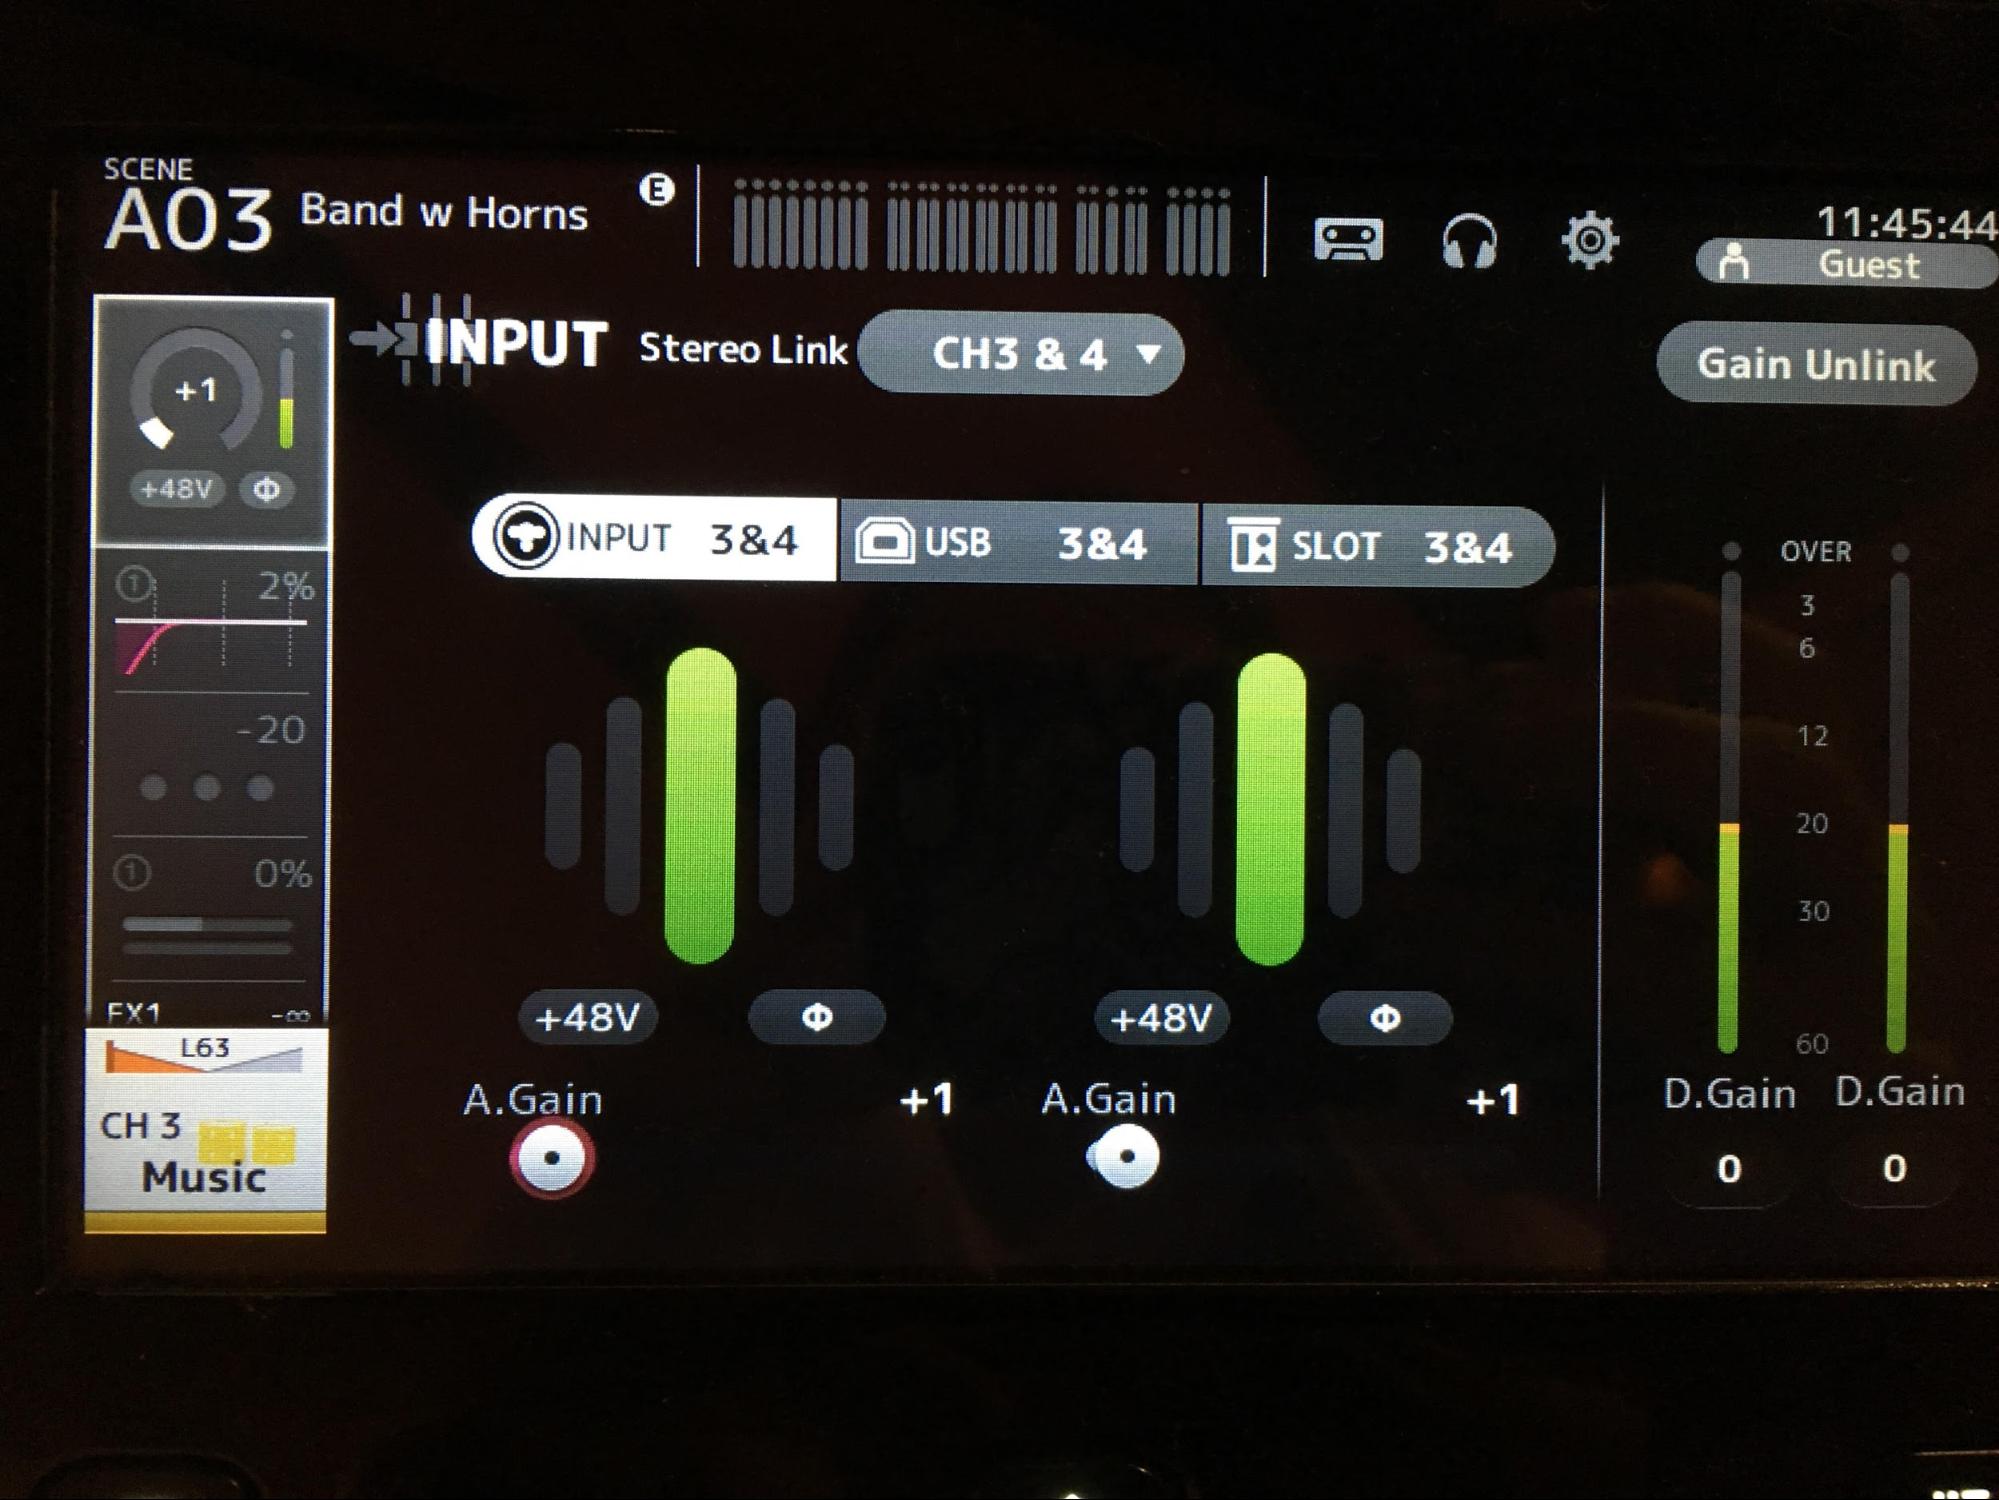
When it comes time to link channels, the Yamaha TF1 allows you to link any two adjacent channels. On most digital boards like the Presonus, as well as some Midas models, you can only link channels from odd to even. However, when I went to link the music channels, I could link 2 & 3 or 3 & 4. When two tracks are linked, the gain is also linked, but can be unlinked by tapping Gain Unlink on the touch screen, allowing you to control the gain individually.
Mixing
Each channel has 4-band EQ, High Pass Filter, and a compressor/gate that you can turn on or off by tapping the name of the processor on the touch screen. In the photo below, you can see that EQ and Comp are green meaning those are the effects that I have turned on. There are tons of presets available for each processor; I would definitely recommend checking them out.

You can adjust settings by either using the touch screen or the Touch and Turn rotary knob; On the touch screen, you tap the parameter that you’d like to change, such as panning or gain, and the Touch and Turn knob will let you make fine adjustments. Below the touch screen are four user defined knobs which control the parameters assigned to them, such as compressor threshold and EQ gain, for quick changes without having to navigate through windows. With so much configurability, there is a lot of tech packed into this 29lb board.

To kick the event off, someone was brought into the ring to sing the national anthem. I wanted a chance to play with the on-board effects so this was perfect. I set up a reverb on FX1 by tapping the “edit” button on the board located in the FX section.

It was easy to change the size of the “room” and length of the reverb tail quickly during the performance, and the reverb actually sounded pretty great. Both the singer and organizer of the event ran over after her performance to compliment the sound.

Overall, I would definitely recommend this mixer. It’s very intuitive with a few different ways to access and change settings so the users can adapt the board to their own workflows.
Have you used this board? Let us know what you think in the comments.