
The name LiquidSonics has become synonymous with extremely high quality reverbs. Certainly in my field of work in audio post, they’ve become one of the go-to brands for realistic simulations of actual acoustic spaces and rooms. My personal favourite is Cinematic Rooms, a plugin which offers believable sounding reverbs to suit a wide variety of rooms and locations of various sizes, ranging from very small domestic settings to huge cathedrals, and everything in between. There are times though, when realism isn’t the goal and something a little more abstract or artistic is required. Let’s consider some ways in which LiquidSonics reverbs can be used creatively in audio post.
Reverse Reverb
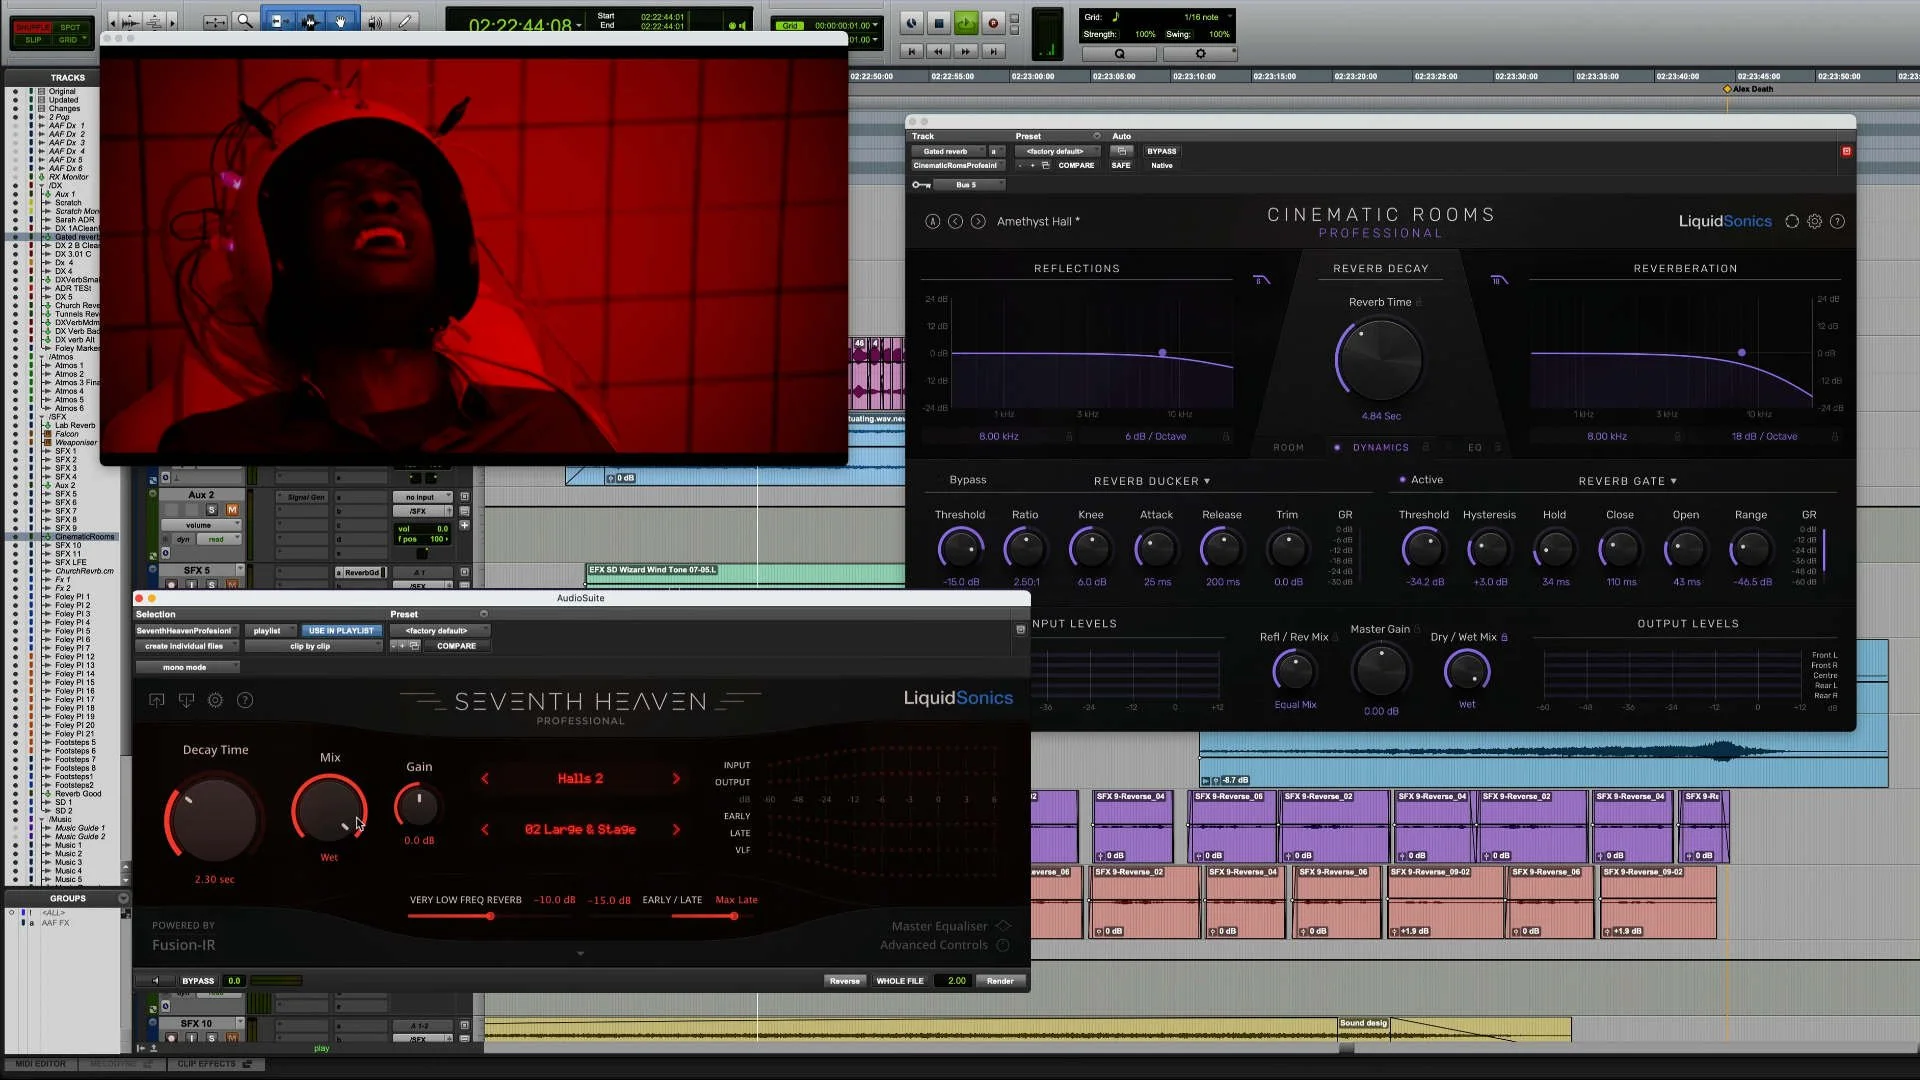
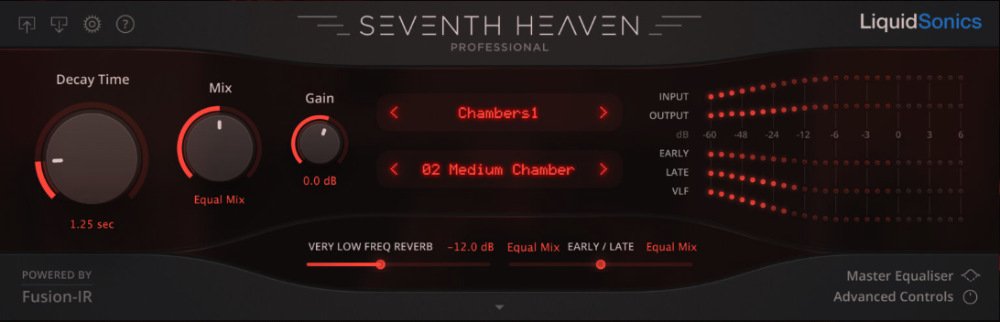
A while ago I was working on a scene where one of the characters is undergoing a traumatic brain experiment in a lab. I wanted to convey his perception of what was happening around him, including the dialogue he hears. In order to take this away from reality and into a space where we get a sense of his altered state of mind, I opted to use Pro Tools’ AudioSuite version of LiquidSonics Seventh Heaven and render the reverb in reverse. Seventh Heaven is a very accurate simulation of the highly regarded Bricasti M7 hardware reverb, and the rich sound of this reverb was ideal for the type of sound I wanted for the dialogue in this scene. By rendering the reverb in reverse, I was able to create a deliberately unnatural but suitable unnerving backwards effect where the reverb trail precedes the dialogue.
In order to do this with Seventh Heaven, I recommend selecting not only the dialogue itself, but also a couple of seconds of space before each clip wherever possible. This allows for the reverse reverb to ramp up to the start of the dialogue line, creating an almost supernatural effect. When rendering the audio in this way, you first need to audition settings with the preview button as usual, try out different presets and adjust as required. Once you have the right setting, clicking the Reverse button will immediately render it to the track. When doing this, you have the option to either set the wet/dry balance with the Mix control in the plugin, or to duplicate the dialogue, render it 100% wet and then balance it against the dry dialogue in your DAW. You can see and hear how this works in the video below.
Gated Reverb
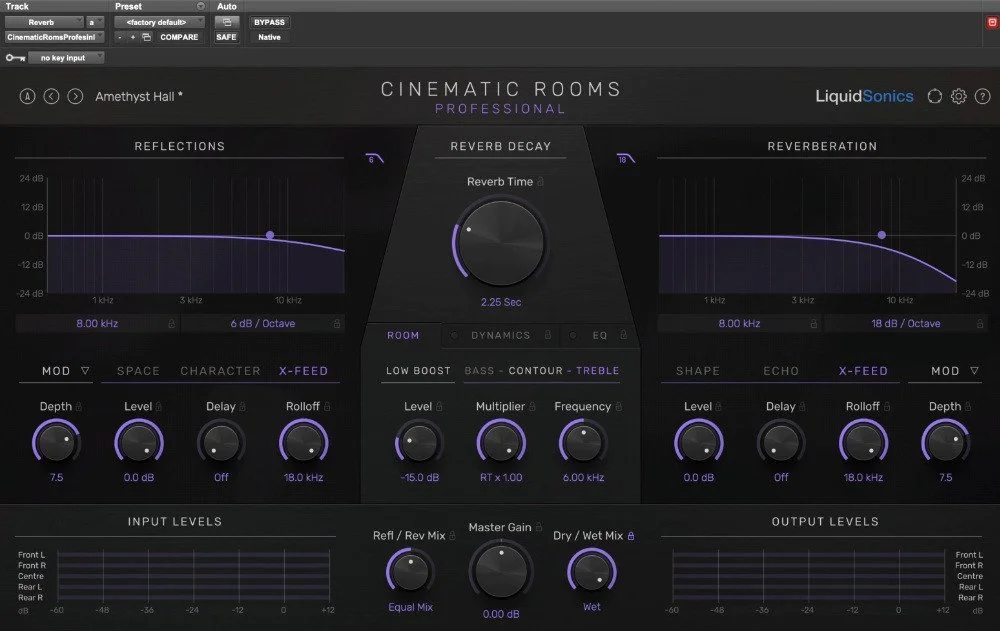
When someone mentions a gated reverb, most people think of the classic drum sounds of the 80s used by artists like Phil Collins and Bruce Springsteen. Gated reverbs can, however, be used in audio post too. Of course, they don’t sound anything like a reverb you would hear in an actual space, and that’s precisely the point. If you need to create something which is a departure from reality, perhaps for sound design, the gated reverb effect is something to consider. In the same scene in which I used the reverse reverb effect from Seventh Heaven, I also utilised a gated reverb courtesy of Cinematic Rooms on the character’s screams. To emphasise his detachment from reality, the gated reverb effect turned out to be an effective way to create something which conveys his nightmarish experience. Heard on its own, the gated reverb might sound a little odd, but when working on something like this, it’s always important to consider it in context and to hear how it sits with the other sounds. In this case, it works nicely. The Dynamics section in Cinematic Rooms provides a number of controls which allow the gate to be set exactly as required. This gated reverb effect is once again demonstrated in the video above.
Crossfeed Control
I’ve mentioned the Crossfeed control before, and it’s something which I find to be one of the standout features of Cinematic Rooms. In essence, it allows you to adjust how the reverb will change in level, delay and frequency roll off for speaker channels which are away from the sound’s location. For example, if you’re working in surround and you have something panning around the room, rather than the reverb remaining uniform in all channels, it will instead respond more as a real space would, with the reverb being less prominent and delayed in parts of the room which are further away from the sound’s current position. For the scene demonstrated in the video, this was a great feature to use when adding reverb to some eerie backwards whispers which pan around the room, again adding to the hellish experience of the character. The scene was mixed in 5.1, but you’ll still get a reasonable sense of it when watching the stereo YouTube video.
LiquidSonics reverbs are very feature rich, providing lots of options for tailoring the sound of the reverberation exactly as you need it. Sure, you can just use presets if you like, but going in and utilising some of the creative options within these plugins can really pay off for creative sound design.
