In recent months at Production Expert we have talked a great deal about different Audio Over Internet Protocol (AoIP) solutions and how they can be used in audio recording systems. In this article, part 2 of a series from a recording session with The Elite Quartet, I am going to elaborate on the recording rig I used to capture the session and show you how I used the Dante Virtual Soundcard (DVS) in place of a hardware audio interface.
Dante Virtual Soundcard (DVS)
OK, when I said there was no audio interface, the Dante Virtual Soundcard or DVS, is technically an audio interface, its a software interface, rather than a hardware box linked to your computer via USB or Thunderbolt. However, in speaking to some of the team at Focusrite as part of my research for both the recording system and this article, they were very surprised that more mobile recording services were not using systems like mine as using DVS keeps the hardware and cabling you need to carry about down to a minimum.
DVS is the link between the external Dante equipped hardware, in this case microphone preamps and an audio output, and the Pro Tools software. DVS appears as a Interface in the Playback Engine within Pro Tools and should be selected if you want to use it. As I’m using Pro Tools as my recording platform I have chosen a 32x32 channel DVS configuration as Pro Tools Ultimate software only allows me to record 32 channels at a time.
For other DAWs, DVS can go all the way to 64 channels but it won’t be hardware accelerated. You can also see the calculated round trip latency using DVS is around 6 milliseconds. That’s low enough not to notice if we had to do any overdubs, but this is a live session so latency is really not an issue.
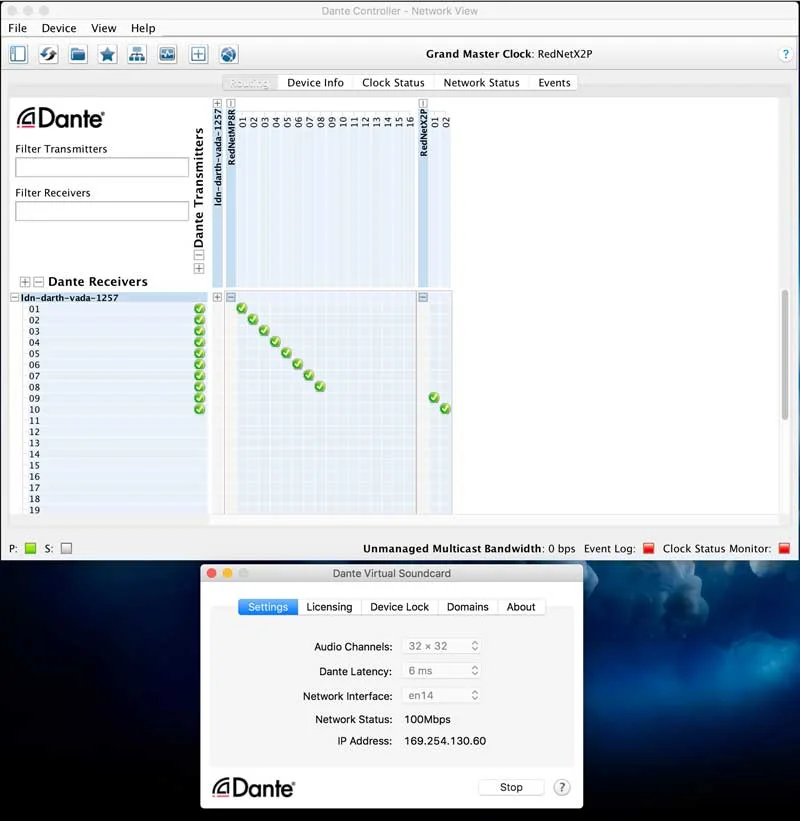
Dante Controller
Think of the Dante Controller software as the routing for your audio (network) signals. This cross-point matrix is your patch-bay for what output goes to what input or in Dante speak Transmitters and Receivers. On the Dante Controller, DVS is labeled with the name of my machine “ldn-darth-vader” so you can see I am sending or transmitting from the first 8 channels of my Focusrite RedNet MP8R mic pre to the first 8 receiving channels of DVS. I then have a RedNet X2P I/O with it’s two built in mic pres set to send to channels 9 and 10 of DVS. If you are new to Dante or audio networking in general it is a good idea to start with a smaller system like this to allow you to get your bearings so to speak. All you then have to do is built a Pro Tools (or other DAW) session with 10 audio tracks and assign inputs 1-10.
RedNet Control 2
As well as the Dante signal carrying the network audio, the Focusrite RedNet units also piggyback control data for their devices into the data stream. This means I can control the gain and settings of the mic preamps for example from any PC or Mac on the network running the RedNet Control 2 application. This is great because it means you don’t have to keep jumping up to tweak a gain setting on a piece of gear that could be on stage while you are a the front of house or recording station. Not such an issue with this tiny rig but in a bigger set-up this is going to save lots of time and leg work.
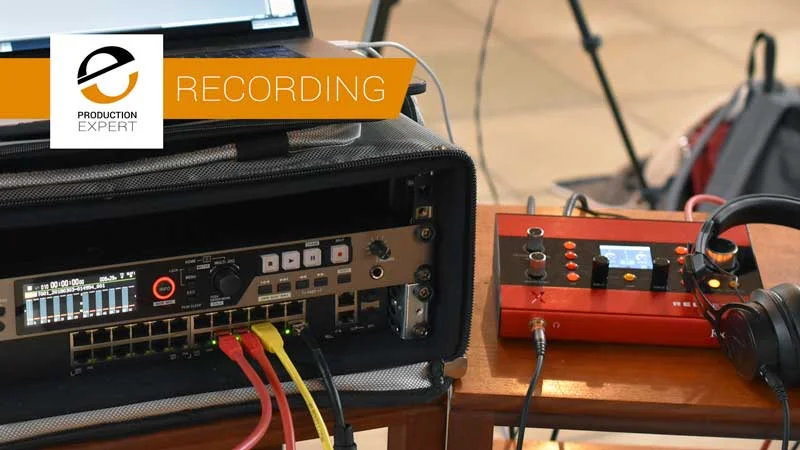
The Hardware
I used a maximum of 6 microphones on this session. Four close mics above the players and a stereo room mic or pair of room mics at the back of the church. The four close mics were plugged into the MP8Rs first 4 channels. I placed the MP8R close to the players on stage to keep the mic cable runs short. The MP8R was then hooked up to the main Cisco network switch using a drum mounted Cat5e (network) cable. The RedNet X2P sat next to me off stage and acted as both my monitor controller and headphone amp as well as the mic pre for the 2 room mics. The X2P was again connected to the switch which was also connected to my MacBook Pro running DVS and of course Pro Tools.
The Cisco switch I have can also provide Power Over Ethernet (POE) which meant I could run the X2P (which is POE compatible) without it’s PSU. I chose not to in this case, but nice to know if the little wall wart were to get pulled it’s not going to take the rig own.

You can also see a Tascam DA-6400 solid state recorder in the rack. More on this in future articles in this series, but just to say that one of the many benefits of an AoIP solution is that if you want to split or tap the signal it is very easy to route it to another location or device, such as a hardware recorder.
There was a lot of gear changes during this session, it was not just a set-up-and-go kind of day and the RedNet rig ran perfectly. You can check out some of the audio that was recorded in the first part Do You Know How To Record A String Quartet? Learn Some Of The Best Practices In A Real World Session and there will be plenty more audio example in future articles in this series.