Last week in part 6 of this series on Audio Post Production Workflows Using Pro Tools, we started looking at ADR in some more detail and the idea of doing ADR on location and Dave Humphries who has been doing ADR on location for many years and continues to take us through what he does….
By using the Mbox 2 Pro, I can give the artist a separate mix to the one I’m hearing. The artist will want to hear the beeps and lines only; I want to hear the recording, to make sure it matches the lips. I would already have loaded all my ‘beep’ cues in to the session Having marked it all up first (using ‘Markers’ to enter then lines and then export the session as text to put that into my Excel/ Numbers sheets for printing) so all I have to check is that the artist can hear the audio and beeps satisfactorily. When marking up your ADR, it’s a good idea to give each line a separate number, so that you can keep track of how many ‘loops’ you have to record.

Click on this image to see a larger versionI often tell artists that I am just going to give them a few ‘run-throughs’, just for them to get their heads around what we are doing; but in fact, I record everything - you never know when you might get the perfect take! Once they have finished a cue or a section, I ask them to have a go at doing a larger section in one go; as this often will give me the breaths I need in-between takes, which will help me sell the idea that this is not ADR.
Some people like to record ADR in ‘Loop record mode’ and make lots of playlists. I prefer not to do that as I find it easier to stop at the end of each take and let the director give the artist a bit of advice or a playback of their last take. Also, it often happens that the director will want to hear bits of different takes spliced together for a playback, so I record on one track only and then Control-Drag it (so it doesn’t move sync) to a new Playback track for editing. I always create a ‘Master Selected Take’ track to give to the cutting room, so they don’t have to start selecting takes to my badly scribbled instructions.
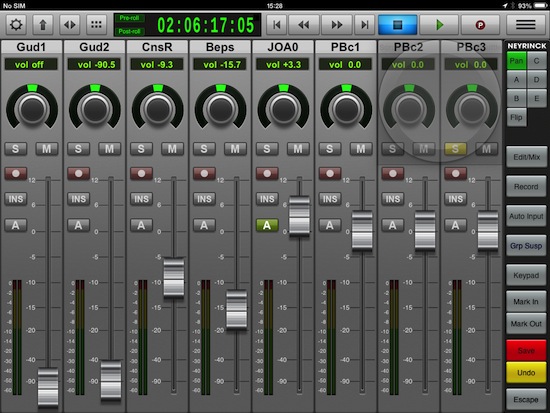
I now use an iPad 2 running Neyrink’s V-Control Pro as a mixing desk. It is much lighter than carrying a real desk around, and it works just as well…..the only thing you need is a stand to stop it sliding around as you use it.
Finally, when the session is finished I make a ‘Save Session Copy’ on another drive. This ensures that all the recorded audio is in the session folder that I give them. There is nothing worse than an Sound Editor phoning you up to tell you he’s got no audio in his session! If I am fitting my own recordings, then I will often use the ‘Vocalign’ plug-in to help me get better sync.
The only other thing to worry about is the quality of the room you are recording it all in. Obviously, if there are curtains, draw them to cut down room reflections. Likewise with cushions and pillows. If there are constant cars or planes nearby, this will be more of a problem, but I have shot in a hotel room where you can use the mattress and all the bedding draped around a room to deaden it.
Coming Up…
In part 8 we will look at Foley with Barnaby Smyth.