

Following on from our recent article where we demonstrated the process of doing a basic post production mix in Pro Tools Intro, this time we take a look at recording and editing a podcast.
If you’re just starting out with Pro Tools, Pro Tools Intro is a great way to familiarise yourself with the overall toolset, layout and workflows of the software. To get started, it’s a good idea to learn how to use the basic editing tools, edit modes and some keyboard shortcuts.
Edit Modes

Pro Tools has 4 edit modes: Shuffle, Slip, Spot and Grid. The edit mode affects how clips are placed and edited on the timeline.
Shuffle Mode
Shuffle mode allows you to move clips around, but their movement is constrained by other clips on the timeline. Moved clips will always snap to the boundary of the next or previous clip, or the session start. When clips are deleted from the timeline in Shuffle mode, subsequent clips will move left by the duration of the removed clips. Shuffle mode is useful when you want to remove clips and automatically close the gaps.
Slip Mode
In Slip mode, you can freely move clips around the timeline with no constraints. Clips do not automatically snap to one another as they do in Shuffle mode. When clips are deleted from the timeline in Slip mode, a gap will be left.
Spot Mode
Spot mode provides a way to place clips at precise timeline locations. When clicking on a clip, or dragging it from the Clip List in Spot mode, the Spot dialogue appears, allowing you to enter a time location. Any timebase can be used, including Minutes & Seconds, Timecode, Bars & Beats, Samples and Feet & Frames. You can choose whether the clip start, end or sync point snaps to the specified location, or snap a clip by its timestamp. When a clip is recorded, it takes on the timestamp of its location on the timeline. Spot mode can be useful when you need to re-position a back to its original location.
Grid Mode
Grid mode actually provides two options, Absolute Grid and Relative Grid. In Absolute Grid mode (the default), clips can be positioned and moved based on a user-definable time grid, typically in the timebase of the session, ie Timecode, Bars & Beats, etc.
Clicking and holding on the Grid mode button will allow you to select Relative Grid. I this mode, clips still move by the specified grid increment, but they maintain their offset, if they didn’t already start on an exact grid boundary.
Of the four edit modes, the two which you are likely to use the most regularly for editing a podcast are Shuffle and Slip.
Edit Tools
The Pro Tools edit tools could take up a whole article by themselves. Some of the tools provide multiple variants but there are 6 main tools. These can be selected from the top of the edit window. Let’s take a look at the basic functionality.
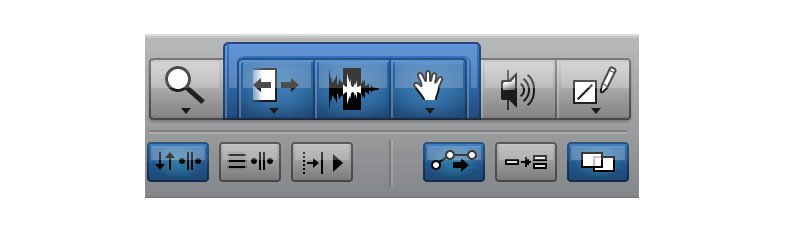
Zoomer Tool
The Zoomer tool does what you’d expect it to; it allows you to zoom in or out. Once selected, you can either click to zoom in, or click and drag to zoom in to a specific section. Holding down the Option (Alt) key while clicking with the Zoomer will zoom out.
Trim Tool
The Trim tool trims the start and end of clips and also allows you to trim various types of automation up and down. The exact behaviour of the Trim tool is determined by the currently selected edit mode.
Selector Tool
The Selector tool makes timeline and edit selections. You might use it to select audio or automation to move or delete, or to select a section of the timeline prior to bouncing to disk.
Grabber Tool
The Grabber tool allows you to select and move clips around the timeline. As with some of the other tools, its exact behaviour is determined by the currently selected edit mode.
Scrubber Tool
When you need to scrub through audio on a track, clicking and dragging with the Scrubber tool will scrub through the track material at a speed determined by your mouse movement. Greater mouse movement will cause faster scrubbing. Audio can be scrubbed forwards or backwards, depending on whether you drag right or left. The scrubber tool is useful when editing a podcast if you need to home in on glitches or pops in the recording.
Pencil Tool
The pencil tool can be used to draw automation, or for waveform repair. When sufficiently zoomed in to the waveform, the pencil tool allows you to re-draw waveforms. This is a great way to remove short duration glitches in the audio, simply by drawing them out. Be aware though, waveform repair with the pencil tool is destructive!
Smart Tool
Clicking in the area just above the Trim, Selector and Grabber tools will enable the Smart Tool. This is a combo tool which incorporates the functionality of these 3 tools. Depending on where you position the tool within a piece of audio, a different function will be active. For a more detailed description of this, and to see it in action, check out the video further down this page.
Recording & Editing A Podcast
In the video below, I demonstrate some of the tools and workflows you can employ for recording and editing a podcast using Pro Tools Intro. This video is aimed at those who are new to Pro Tools, so it’s a basic approach but one which covers a lot of the edit tools and methods which can be handy on a day to day basis.
In the video I cover two of the edit modes, Slip and Shuffle. These are perhaps the most useful two when working on podcast content. The video also covers the basics of recording and editing a voice over, importing and positioning sound effects and music, and finally bouncing the finished mix to disk in both WAV and MP3 formats. This isn’t intended to be a definitive guide to how things should be done in Pro Tools. It’s an example workflow. Take from it what you find useful, and adapt and fit the workflows to suit your own needs.
Shortcuts
Here are the keyboard shortcuts covered in the video. These are the Mac shortcuts. For the Windows equivalents, substitute Command for Control and Control for Start.
| Task | Shortcut |
|---|---|
| Create New Track | Shift Command N |
| Toggle between mix and edit windows | Command + |
| Zoom out | R |
| Zoom in | T |
| Separate clip | B |
| Trim clip end to cursor location | S |
| Trim clip start to cursor location | A |
| Consolidate clip | Option Shift 3 |
| Create clip group | Option Command G |
| Ungroup clip group | Option Command U |
| Fade in from clip start to cursor | D |
| Crossfade | F |
| Fade out from cursor to clip end | G |
| Solo track(s) containing cursor | Shift S |
| Do to all selected tracks (eg, mute or solo) | Option Shift click |
| Do to all tracks | Option click |
| Adjust all track heights to fit in edit window | Control Option Command, down arrow |
| Toggle track view between waveform and volume | - (Minus key at top of keyboard) |
| Mute selected clip | Command M |
| Drag copy of audio file to another location | Option drag |
| Add sync point to clip | Command comma |
| Snap clip sync point to cursor location | Control Shift click on clip with grabber |
| Zoom to fit whole timeline duration in edit window | Option A |
| Select from cursor to session start | Shift Return |
| Select from cursor to session end | Option Shift Return |
| Bounce mix | Option Command B |
