in audio post-production, we can end up with some challenges because in production or pre-production factors like timecode formats and frame rates were not agreed and so when it gets to put it all together in post, we end up with video and audio not staying in sync.
In this article, Keith Morrison, whose main work is working on set for feature films and television as a sound assistant. As well as working as a sound recordist and sound editor on short drama productions, explains the use of timecode when filming and how to use timecode equipment with a variety of audio equipment and cameras so that in post we don’t end up with sync drift issues ad everything lines up.
What Is Timecode?
Timecode is now metadata that is documented at the start and end of a file. It can be used to replace the manual task of aligning multiple video and audio sources.
Traditionally you would use the clapperboard to align the video and audio by matching the frame at which the board closes to the waveform transient created by the sound of the board closing. However, this method can be time-consuming.
Timecode allocates each frame a number and by simultaneously allocating the same number to each frame across each device (all cameras, all audio recorders), alignment of each source can be done quickly in post-production.
Although timecode is now metadata and professional equipment will have dedicated interfaces and menus to deal with it, timecode can also be recorded as an audio track and this opens up the use of it in a wider variety of film-making equipment.
if you want to learn more about timecode then we have 3 articles that cover the history of timecode, including the origins of timecode from film frame rates and then how it developed in broadcast television and that created another raft of different timecode frame rates to match the different broadcast TV standards.

Synchronisation
The distinction between timecode and synchronisation is important to mention.
Timecode is not synchronisation as each device uses its own internal clock to manage timecode and not all clocks are equal. The internals of each device work at varying speeds and accuracy. Over time each recording device can drift out of sync. This isn’t much of an issue when dealing with short recordings however can be a problem with very long takes. As mentioned before, timecode is metadata stamped at the beginning of each take. In order to synchronise each device, a sync format would need to be applied.
The sync format in video is Genlock and it is determined by the resolution and frame rate of the video. In audio, the sync format is Wordclock and is determined by the sample rate.
Sync is generally implemented on professional standard timecode equipment and cameras and not really something to be feared when working with equipment that doesn’t support it.
Working With Timecode
Depending on the equipment, timecode will need to be synchronised between each separate device.
In most professional audio recorders and cameras such as the Sound Devices 6 series and the Arri Alexa, the timecode will be managed internally and using a cable between the two (or more) devices, the timecode can be ‘jam-synced’ (synchronised).
Usually, this is done via the audio recorder to the camera. However, the downside to this is that once the devices have been jam-synced, the timecode on each device is managed by its own internal components and as mentioned before, these are not made equally and can often run at varying speeds and accuracy. This inevitably causes drift as time goes on ranging from a few seconds to several minutes. The more devices (cameras) that are running, the more issues can arise. For this reason, when a device is jam-synced and timecode is dependent on the internal clock, it is important that it is re-jammed after every power cycle and at regular intervals throughout the day. This is very time consuming especially when working with multiple cameras and the responsibility to do this can often fall between the cracks of the camera and sound departments.
A solution to this is to use a dedicated timecode generator, a small device that is attached to each audio recorder and camera. Each timecode generator is jam-synced to the main device giving more reliable timecode sync throughout a shooting day.
However, depending on the manufacturer, there is also an option to wirelessly sync the timecode generator for an even more stable timecode sync solution. The wireless connection between the main timecode device and the satellite timecode generators means that the need to manually re-jam each device is no longer required unless an issue occurs such as limited wireless range, connection issues or changes in the camera settings.
Most professional devices will easily work with a timecode generator and embed timecode metadata into the recorded file. However what about audio recorders and DSLR cameras without timecode options? All that is needed are at least two timecode generators and an audio track on each device. By syncing each box and plugging the output cables (usually mini-jack) into the camera/audio recorder, the timecode can be recorded as a linear audio track. This audio track can then be converted in the editing software as timecode metadata.
It’s important to note that no matter what level of equipment you are working with, jamming devices, using timecode generators through dedicated inputs and outputs or via audio tracks, the frame rate must be set correctly.
Frame Rates
The frame rate of each device must be the same. In pre-production, the frame rate will be set by the camera department. Common frame rates in the UK are 24 fps (frames per second) for film and 25 fps for television (PAL). For productions in other parts of the world rates of 29.97 fps (NTSC) and 30 fps are common.
It is important that the frame rate on each device (camera, sound recorder and timecode generators) match, otherwise this can cause drift due to the number of frames in a second differing. This is especially important if you are using a DSLR and recording timecode onto an audio track. On most professional cameras you will have a visual indication when there is a timecode mismatch, however, when using the audio track method there will be no visual indicator so greater care must be taken when setting up.
Types Of Timecode
There are two main types of timecode, record-run (rec-run) and free-run.
Record-run is timecode that is turned on as soon as the record button is pressed and only counts the runtime of the recorded file. In order for record-run to work, all the devices must be linked and set to record by a central trigger, which is not really practical in a multi-camera production environment.
Free-run is timecode that is running continuously. Free-run can be set to any time but generally, time of day (TOD or 24 hour continuous) is used in productions. This allows each file to be referenced to the shooting day. When using free-run and TOD, each device no longer needs to be set to record at precisely the same time.
However, this workflow can cause problems if you are working past midnight and using a 24-hour continuous timecode setting. If this is going to be the case, then it is good practice to alter the time of day to ensure that the timecode does not go past midnight. This will then keep files in the same daily folder and in chronological format when imported into the edit.
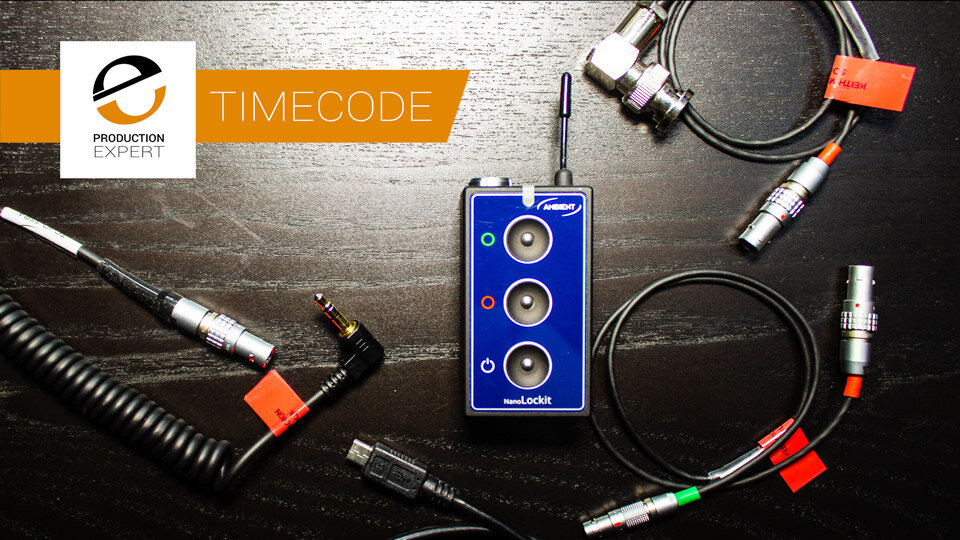
Equipment

There are a range of solutions and depending on your requirements and budget, there will be one that will suit your situation. I have used a variety of manufacturers at differing levels of production from corporate video to feature film but most offer the same package.
Timecode slate - A clapperboard that can be jam-synced and display the timecode
Main device - the hub of the timecode, the timecode generator that jam-syncs all other devices
Satellite device - smaller timecode generators that can be attached to cameras
Wireless network solution - usually built into each device and serviced by the main device

Figure 1 - Sound Mixer / Recorder jam-synced manually with timecode generator, same timecode generator then connected directly to a DSLR camera.
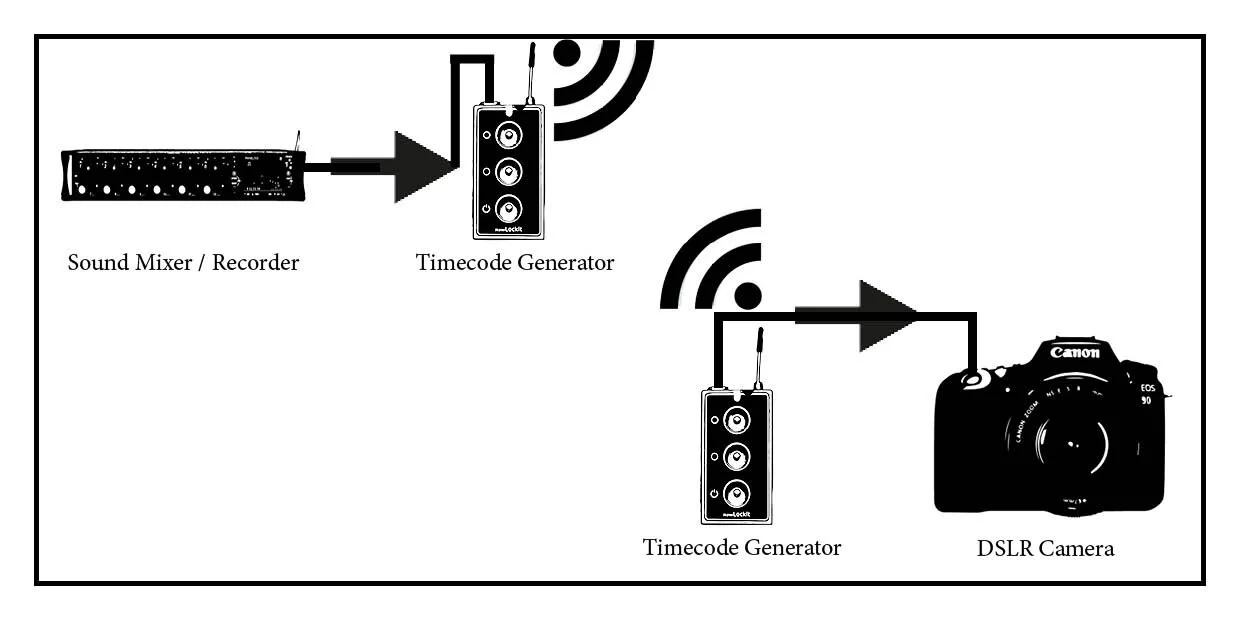
Figure 2 - Sound Mixer / Recorder connected to a timecode generator, wirelessly synced with a second timecode generator connected to a DSLR camera.

Figure 3 - Sound Mixer / Recorder connected to a timecode generator, wirelessly synced with a multiple timecode generators connected to cameras.
Connections
Having the correct cable is very important. Different camera manufacturers use different connectors when receiving timecode from an external source.
Typical connectors include 5-pin Lemo, 4-pin Lemo, BNC, mini-Jack.
Not all cables are bi-directional, depending on the wiring and connector, the flow of timecode may be in one direction. This is important when connecting to or jam-syncing from the main timecode generator to satellites. Make sure that the correct device is being used as the main generator.
With the right cable, timecode can be implemented for most cameras and audio devices, just be aware that if you are looking to purchase your first set of timecode generators, budget for the cables too.
Further Resources
Tentacle Sync is a company that offer timecode solutions on a budget. Their current Tentacle Sync E utilise Bluetooth to enable sync via an iOS or Android device. Each device also has a built-in microphone which is very useful when using with a DSLR camera. This means that you can record reference audio track alongside the timecode audio track.
Timecode Systems offer a variety of professional wireless solutions which includes :pulse, which is their main hub solution that use the ‘BLINK’ network to share timecode and sync data with other devices such as the UltraSync One which is small and has LTC (Linear Timecode) and Genlock and Wordclock outputs.
There is also a workflow tool on their website which allows you to select the type of device you are working with and offering a device that will enable timecode to be implemented.
Ambient is a company that offers a professional solution that includes the MasterLockit as the hub of their timecode system. Using the ‘ACN’ network the MasterLockit syncs timecode and metadata with LockitSlates and NanoLockits.
There is also the Ambient University, which is a collection of videos relating to timecode and sync.