The ability to slice audio loops up into their constituent hits and map them across the keyboard for unfettered rearrangement has been a staple music production technique since 1994, when the release of Propellerhead’s Recycle! application changed the sampling game forever.
With this collection of concepts and ideas, we aim to help you get more out of your beat chopping ventures. We’re primarily referring to loop slicing in the sampler-based sense of the term here, but as our first tip reveals, that’s not the only option.
Use Audio Tracks
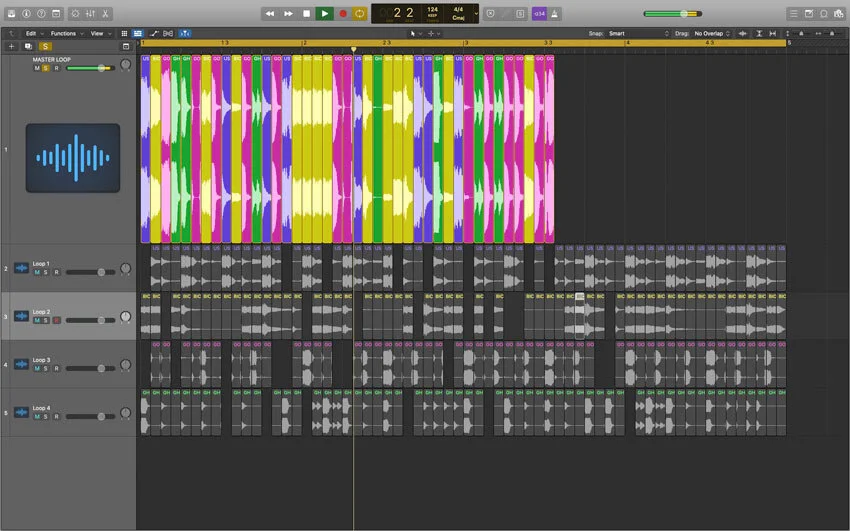
Although there are numerous amazing MIDI-triggered plug-in loop slicing solutions available to the blade-wielding muso, don’t overlook the creative benefits and immediacy of slicing loops directly on audio tracks in the arrange page. Most DAWs offer a modified (via the Option key, usually) cut tool function that automatically slices an audio clip into contiguous evenly-sized regions, the length of which is determined by how far into the clip you click – click an eighth-note in to divide the whole thing into eighth-note slices, for example. Having done that, copy the slices to random or calculated positions on a second track to quickly rework the groove, applying short fades to clicky transitions if necessary. Slicing audio ‘en track’ also makes it easy to…
Mix Up Multiple Loops
Why chop up one loop when you can take the axe to two… or three… or as many as you like? Interweaving slices from multiple source clips is a surefire way to get the musical juices flowing. While certainly doable using one or a series of samplers, by far the most straightforward method of comping a stack of clips down to a single loop is to use audio tracks, as described above: pile your source loops up on as many tracks as required, slice them all up evenly, then drag the resulting sonic shards onto a ‘master’ track at the top. And don’t be put off by the seemingly restrictive linearity of this particular workflow – that’s kind of the point.
Don’t Always Slice At Transients
Setting your slicing algorithm to cut your loop at transients seems like a no-brainer, as it ensures that the hit within each slice fires immediately when triggered; but we’d encourage you try whatever alternatives your sampler provides, too, especially the fixed-length options – ‘slice at 16th-notes’, ‘slice at quarter-notes’, etc. These effectively increase or lower the ’resolution’ of your slicing grid, steering your beat design away from the usual cleanly extracted single hits and into a rougher realm of detached cymbal tails, vibey groove ‘chunks’ – a snare followed by a couple of hi-hats, say – fragmented shakers, glitchy snipped transients and more.
Play With Envelopes And Gate Length
Beyond the very short fade-outs that many auto-slicing systems apply to alleviate clicks on playback, your sampler is packed with powerful tools for transforming the dynamics of the individual hits within a sliced loop. Not least among these is gate mode, which ties playback of each slice to the length of its triggering MIDI note (as opposed to one-shot mode, where the slice plays all the way to the end regardless of trigger duration), enabling precise control over kick drum tails, open hi-hat timing, etc. And for more detailed contouring of volume and frequency content, amp and filter envelopes are well worth exploring.
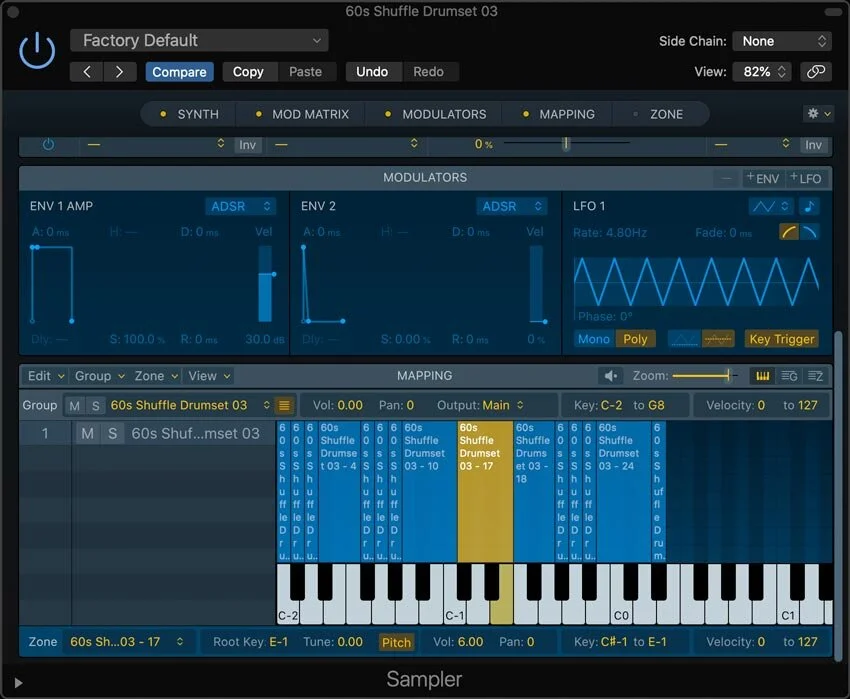
Map Slices Across Multiple Keys
Most automatic loop-slicing algorithms map each slice of the input loop to a single note on the MIDI keyboard, thus preserving the pitch of the original audio on playback. By manually mapping slices across multiple notes, with your sampler in repitch mode (with or without timestretching), however, you can work pitch variations on individual slices into your rearranged beats for subtle humanising or more overt creative effect. It might involve a bit of wrangling, depending on your DAW or plugin, and the loop in question, but the results will justify the effort.
Shuffle And Groove
One of the main reasons to slice a loop in the first place, of course, is to toy with its fundamental timing, and the current generation of DAWs offer all manner of shuffle, swing and/or groove mapping features that make such comprehensive temporal manipulation instantaneous and effortless. Indeed, even if you have no intention of reordering the slices in a given loop, applying a touch of MPC-style swing to it, or imposing the rhythmic nuances of another loop entirely, might be all that’s required to make it work in the context of your track.
Not Just For Drum Loops
This one will go without saying for some and be not at all obvious to others, but you don’t have to limit your loop-slicing antics to drum and percussion loops. Basslines are particularly amenable to rearrangement, but evolving pads, processed vocals and just about anything else are fair game, too. Make sure your source material is as dynamically fluctuant and heavy on modulation as possible, though, as you want a good range of tonal variations to jump, shift and transition through as you sequence your slices.
How do you prefer to take the scalpel to your loops? Let us know in the comments.