A little while ago you might have heard me tell the tale of the passing of my 2012 MacBook Pro. Well, It turns out that, contrary to popular belief that there are indeed some user serviceable components inside these machines and the team as OWC sent me an Aura SSD Upgrade kit to see if this might help bring my machine back to life. In this article, I'm going to show you how to swap the SSD in a 15" MacBook Pro 2012.
Disclaimer
There are two important things to take into consideration before you even start to think about doing any work on your computer:
Am I technically confident to open up my machine? If you do not feel that you are a "tech-savvy" kind of person then stand well back and leave it to the "professionals". This stuff is not technically difficult but it's not for everyone.
Is the data on the drive that I am removing backed up in at least 3 places? Please please please do no undertake open drive surgery on any machine if it is not backed up. In this case, we are going to be putting the drive which we are removing into an external case so we can use it as a portable hard drive. We can then use this old drive to copy the data to the newly installed upgraded drive. However, mistakes and accidents can, and do happen and I'm sure that data has been lost in the past. You have been warned!
What's In The Box
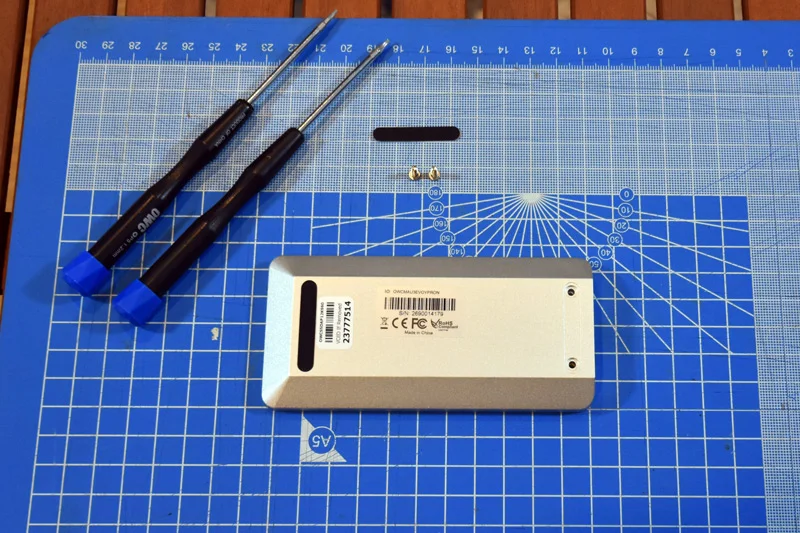
The OWC Aura SSD Upgrade kit contains all the goodies not only to upgrade the SSD inside your 2012 MacBook Pro but it also comes with a case to put the SSD you are removing into as in this case I will not only be upgrading the 512Gb SSD in the Mac to a 1Tb but I will also be gaining a 512Gb external USB3 drive in an Envoy Pro case which I reviewed a little while ago.
It is worth noting that OWC makes a range of SSD upgrade packs. This particular one is designed for MacBook Pro 10,1 and 10,2 2012 with Retina Displays. Other kits are available and for more information on this check the OWC website.

The box contains the following:
1Tb SSD (other sizes are available)
Envoy Pro Case (and soft bag)
Screws and footpad to complete Envoy Pro case
USB3 Cable
1x P5 1.2mm Star screwdriver to fit the screws on the underside of your MacBook Pro Case
1x T5 Torx driver
Getting Started
Find yourself a nice flat space free from dust and clutter to start the upgrade. My MacBook Pro (MBP) has had a hard life and seen better days but you may wish to protect the top of your mac to stop it picking up any dents, marks or scratches. I'm sitting my MBP on a self-healing cutting board but you could use a soft towel or cloth.

Step 1. Using the P5 1.2mm star driver remove the 10 very small screws that secure the back plate of the MBP. You can see here on the left of the above image I have looped a piece of white gaffer tape. I use this to keep the removed screws in place in order not to drop any.

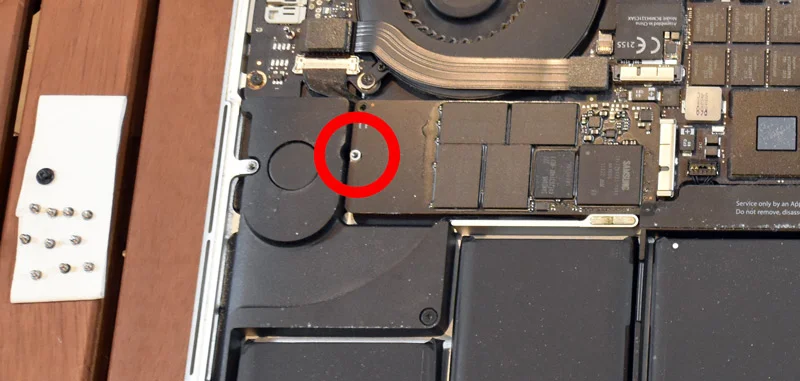
Step 2. Once you have removed the back of the MBP you can see the SSD in the mid left of the picture. Using the Torx T5 driver remove the screw that holds the SSD in place. The SSD module can then be slowly and gently slid out of the receiver.


Step 3. Remove the new OWC Aura SSD from its bubble wrap and anti-static bag and slide it into place being gentle yet positive with sliding the drive into its receiver.
Replace and secure the Torx T5 screw that holds the SSD in place.

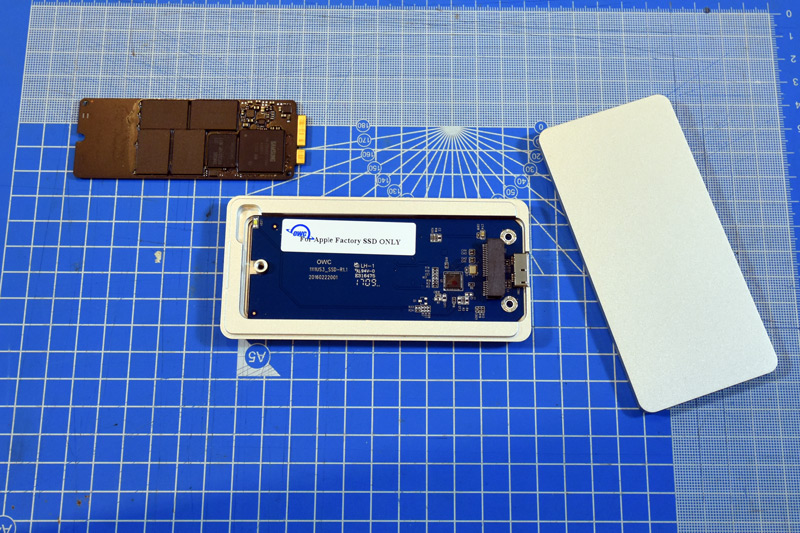
Step 4. Replace the MBP back panel and re-screw the 10 star screws with the P5 1.2mm driver. That is the tricky bit done. Now all we need to do is slot the old SSD into the new OWC Envoy case. Secure the SSD in the case with the P5 1.2mm screw from the pack.
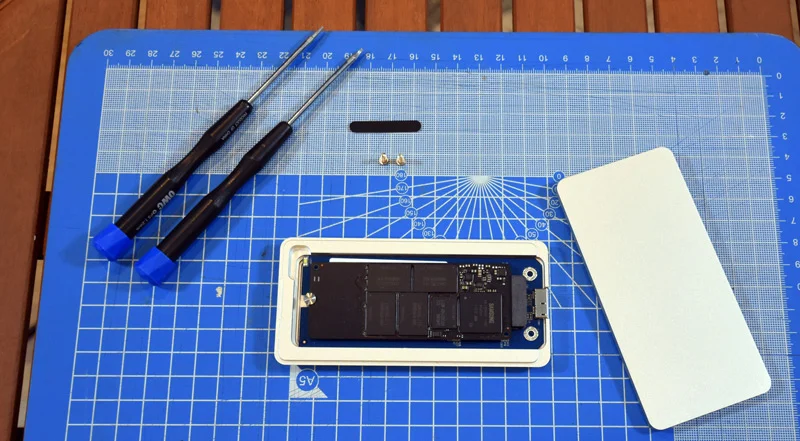
Step 5. Place the lid of the Envoy Pro case over the SSD and secure with the 2 Torx T5 screws from the pack. To finish the job affix the foot sticker over the screws.
Step 6. You are now ready to copy the data from your External Drive onto the new internal OWC Aura SSD. You can either do this with Apple's own Time Machine system or using a third-party app such as Carbon Copy Cloner (CCC). I am not going to cover this process in this article but you can refer back to a previous article where I, with the help of Richard 'Rich' Rogers, demonstrate how to install from a clean system installation.

You can see from the above image that my 2012 MacBook Pro is now very happy with its new 1Tb SSD and as they often say after major surgery, so far the patient is stable and doing well.
If you have any questions about this upgrade please do drop us a note in the comments below and we will do our very best to back to you.