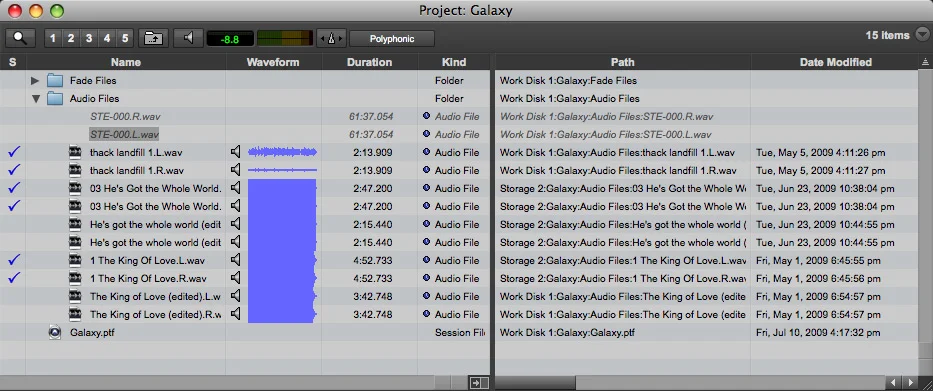
How many times have you opened a Pro Tools session to be greeted with the “Missing Files” window above. Pro Tools will throw this window up if any files have been moved since the session was last opened as the session file remembers the path to each file. So do not move files used by Pro Tools because the next time you open the session you will get this Missing Files window.
You can get the Missing Files window when you have moved a session from one drive to another. Sometimes you find that you end up with audio files spread across more than one drive and you want to be able to bring them back together. One of the best ways to prevent this is to use Save Session Copy In...
1. Save Session Copy In...
This is great for when you want to hoover up all the files associated with a session that may be anywhere on your system and collect them together and create a fresh session folder on another drive, perhaps to pass the session onto about colleague and will help prevent the Missing Files window coming up later down the road.
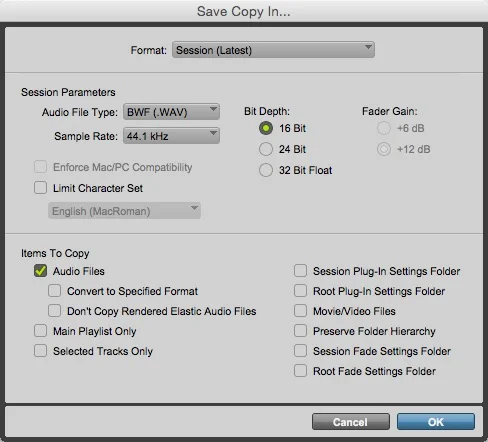
Go into the File menu and select Save Copy In…. The Save Session Copy setup window will open. Here you can set the file format, bit depth and sample rate of the copy session, which normally would be the same as the original session. The lower section is where you can determine that will be copied into your fresh session folder and includes, not only audio files but also plug-in setting folders and video files to hopefully make the transporting of a session as smooth as possible. The key one to chose if you are hoovering up audio files from around your system is to make sure that under 'Items To Copy' the Audio Files option is checked, as above. Once you are happy with the settings you can click OK and then you will be presented with the normal navigation window where you can set where on your system you want to put your fresh session folder.
2. Force Relinking In Pro Tools
However, there are often times where you pick up a project where the person's session and file management is less than perfect and you end up with the dreaded Missing Files window.
Normally if you get the Missing Files window providing the files are on your system somewhere then if you set the Missing Files window to Automatically Find & Relink it should find all the files but it doesn’t always, in which case you need to give it a helping hand.
I have even had situations where a client's session would not find the media even though they were clearly there on a connected drive. Even though I directed the Relink window to look only in the correct folder Pro Tools still wouldn’t find them, and then I remembered the old Force Relink trick and so here it is for you as well…
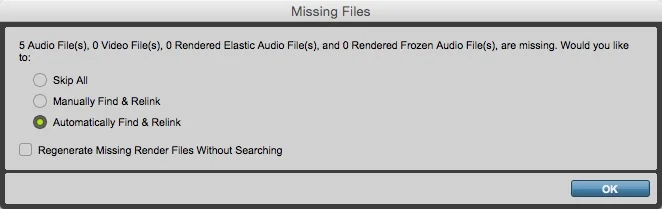
Open the session, and if necessary select Skip All in the Missing Files window. Once the session opens, there may be, of course, a number of sky blue regions denoting media Pro Tools can't find.
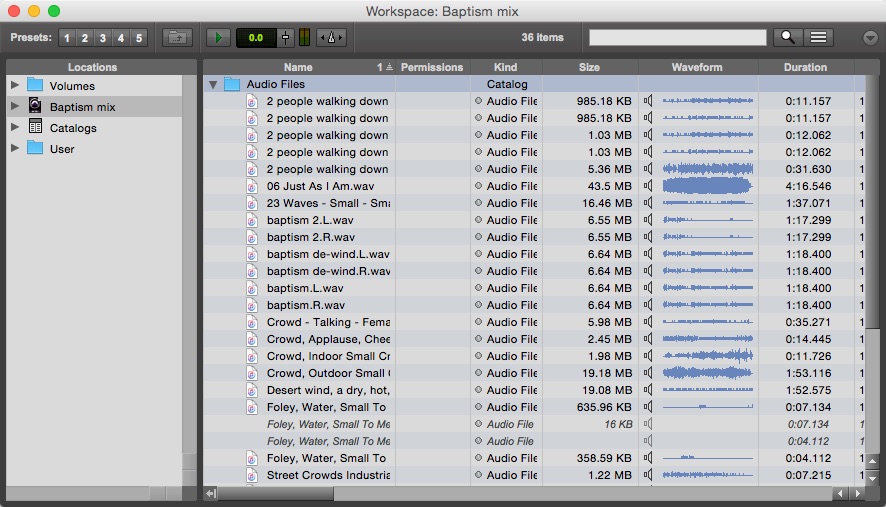
Go into the Window menu and select New Workspace. In the Workspace window in Pro Tools 12 Select the session that is open.
In older versions of Pro Tools, you will need to select the Session Browser option in the Window menu.
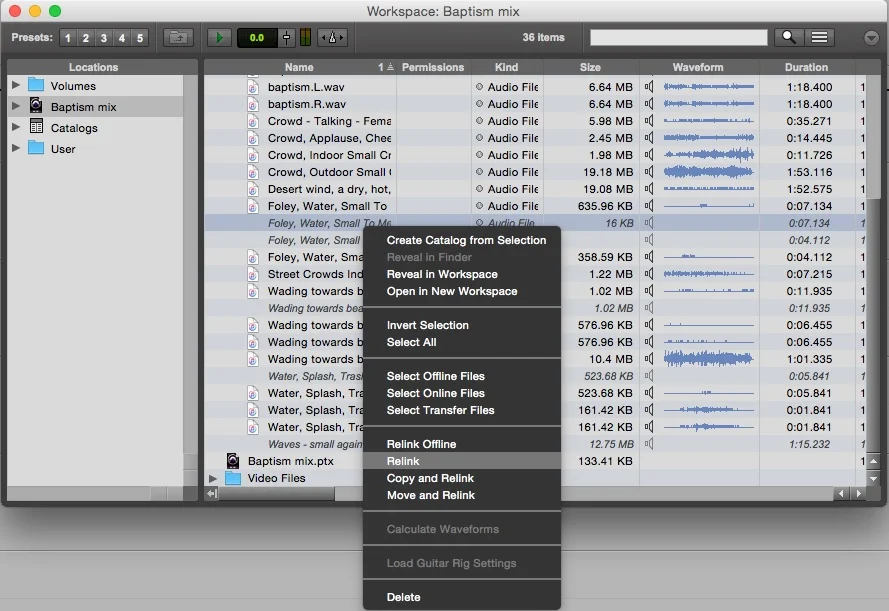
Either way, go into the session's audio files folder and select an audio file you want Pro Tools to relink. Right-click on one of the missing files, shown in italics and select the Relink option. This will put that file into the Relink window. In older versions of Pro Tools you may need to use the Toolbox icon in the top rigth hand corner f the Session Browser and select Relink from there.
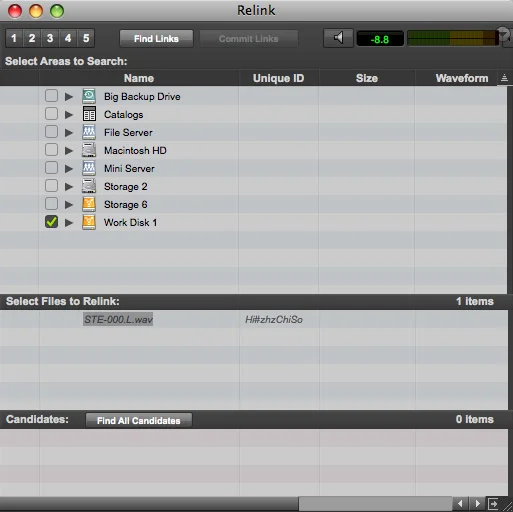
Now open the Workspace Browser from the Window menu and find the file you would like Pro Tools to link to but for some reason it can't find. Drag that file into the Candidates section of the Relink window.
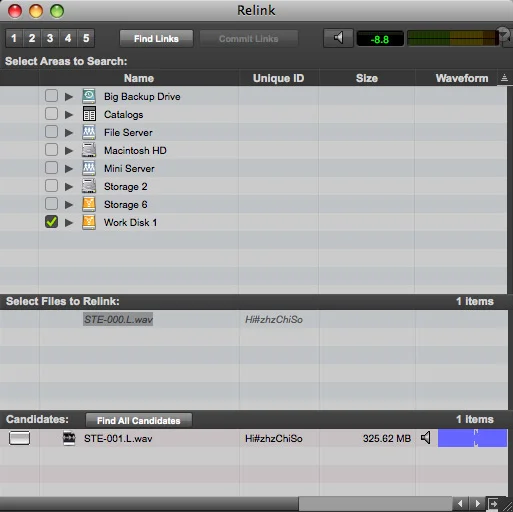

Look in the left-hand image, that in this case although the file name has changed, the Unique ID is the same. Click on Relink button to the left of the file in the Candidates section as in the right hand image and then click on the Commit button at the top of the Relink window, confirm you want to complete the relink, and the file will be relinked and very quickly the blue regions relating to that audio file will regain their normal look.
Missing File Not In The Session Folder?
If the file you relinked was not inside the session folder, or you just want to put all the files into your main Audio Files folder, you might want to consider using this final step to resolve that potential problem...
In the Session Browser right-click the relinked file and select Copy and Relink.
Pro Tools will then ask you where you want to put the copied file and will offer the main Audio Files folder as a default, which will almost certainly where you want it.
This will get Pro Tools to make a copy of the audio file and put it into the session's audio file folder and link to that copy rather than the file somewhere else on the system. It is always safer to have all your audio files inside the session's audio files folder.
UPDATE: If you have a lot of files, the other way of doing this is to close the session, close Pro Tools, for safety, move all the files into the session’s audio files folder and then open the session. You will get the Missing Files window, this time select Automatically Find & Relink and Pro Tools will take a while to find the first couple but should then work out that they are all the Audio Files folder and finish the job more quickly.