

While experienced Pro Tools users take them for granted, there are a few key differences between the edit tools in Pro Tools and other DAWs. Its worth looking at them in turn and highlighting some of the less obvious points.
Three of the edit tools get used far more than the others and this is reflected in their functions being combined in the Smart tool. If there is a “default” tool in Pro Tools it is probably the Selector but the Grab and Trim tools get used nearly as much.
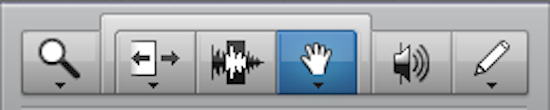
Selector - F7

One of the first questions I get asked by new users is where the scissors are. Pro Tools doesn’t work that way but the equivalent would be using the Selector tool to make an edit selection (where do I want to cut?) and using one of the edit operations found under the edit menu or more probably its keyboard shortcut (separate at selection being the most likely one: Shortcut CMD+E/Ctrl+E). The Selector tool is used for making edit and timeline selections. Earlier in this series I wrote a piece on the edit and timeline selections and if you are unsure about what these are I strongly recommend reading it. With timeline and edit selections linked you can use this tool to tell Pro Tools where you would like to play from. If you drag a selection Pro Tools will play from the beginning to the end of that selections and if you right click the play button or press CMD+Shift+L/Ctrl+Shift+L you can loop your selection. I see many Logic users clicking in the timeline ruler at the top of the edit window to start playback from a particular point, this is unnecessary if your timeline and edit selections are linked, instead you can just click on the clip or an event within a clip and playback will start from there.
Grab - F8
The Grab tool is used for picking up clips on the timeline. It is also used for creating and deleting breakpoints in automation playlists and can be used to “rubber band” or lasso Midi events. A useful distinction to draw is that if you are working with clips you probably want the Grab tool and if you want to work on the events within the clip you probably want the Selector. There is a small triangle at the bottom of some of the tool buttons, these indicate additional versions of the tool. While there is only one Selector tool there are three versions of the Grab tool but their use is not something a new user needs to investigate straight away. This is not the case with some of the other tools though.
Trim - F6

The Trim tool is used to adjust the length of a clip by moving the start and end boundaries of the clip. It does however have other uses. It is indispensable when editing automation as making an edit selection and trimming automation up or down will create breakpoints at the selection boundaries and preserve existing automation whilst trimming the overall level of that track up or down. For non HD users this mimics Trim Automation - An HD only feature. There are alternative versions of the Trim tool. The scrub and loop Trim tools aren’t something I use often. There are other ways of looping which I prefer though this may be a familiar workflow to users of other DAWs, the Scrub Trim tool is something I have only ever used for editing dialogue. For an explanation of its use read about the scrub tool in part 2. The TCE trim tool stands for Time Compression/Expansion trim. Rather than trimming the clip boundary and concealing or revealing additional audio the TCE trim tool timestretches the audio to the new length. For new users this is an excellent tool for use with loops to conform audio to the session tempo.
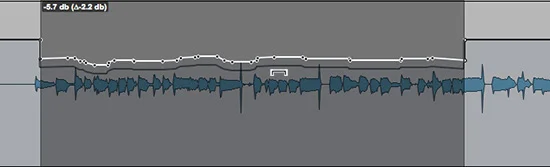
Trimming Automation
There is much more to say about the edit tools, part 2 to follow. I’ll be looking at the Scrub, Pencil, Zoom and Smart tools.